Launchpads are a fundamental element in integrating Norlax into your product. They serve as a collection of settings that provide instructions for the AI's behavior, its functionality, and data access.
In Norlax, you can have multiple chats. Each chat is composed of messages and settings. These settings include the GPT version to be used, the system prompt that guides the AI's behavior, available functions, accessible documents, etc.
A launchpad is a set of these settings. When you create a new chat using a launchpad, the chat automatically adopts the settings defined in the launchpad. For instance, a launchpad with the settings "GPT-4" and "System Prompt: Keep your answers short" will create a chat with these exact settings.
Launchpads serve two main purposes:
Follow these steps to create your first launchpad:
Congratulations! You've successfully created your first launchpad. You can now use it to create new chats via the SDK.
Also checkout our Getting Started guide to setup a public launchpad step by step for an actual use case.
The Norlax SDK allows you to create interactive widgets that can be embedded into your web applications. In this example, we have a widget that displays a square with a color that can be changed. The Norlax SDK provides a function called `NorlaxWidget.registerFunction` which allows you to define a function that can be triggered by an AI assistant. In this case, we have a function called `changeColor` that takes a color as input and updates the color of the square. The widget also includes two buttons that trigger the `NorlaxWidget.sendMessage` function to send a message to the AI assistant. The AI assistant recognizes the messages and triggers the `changeColor` function with the appropriate color. This example demonstrates how the Norlax SDK can be used to create interactive and dynamic widgets that can be controlled by an AI assistant. It provides a seamless integration between your web application and the AI capabilities of Norlax.
"use client"

import { NorlaxWidget } from "@Norlax/sdk"
import { useEffect, useState } from "react"
import { z } from "zod"
import { Button } from "~/shadcn/components/ui/button"

export const Widget = () => {
  const [color, setColor] = useState("#888888")

  useEffect(() => {
    return NorlaxWidget.registerFunction({
      nameForAI: "changeColor",
      descriptionForAI: "Change the color of the square using hex codes",
      inputSchema: z.object({
        color: z.string(),
      }),
      execute: async ({ input }) => {
        setColor(input.color)
        return {
          output: `Changed color to ${input.color}`,
        }
      },
    })
  }, [])

  return (
    <>
      <div
        className="flex h-80 w-80 items-center justify-center rounded-md border text-3xl"
        style={{
          backgroundColor: color,
        }}
      >
        {color}
      </div>

      <div className="mt-2 flex flex-row gap-2">
        <Button
          variant="outline"
          className="flex-1"
          onClick={() => {
            NorlaxWidget.sendMessage({
              message: "Make the square blue as the sky",
            })
          }}
        >
          Blue as the sky
        </Button>
        <Button
          variant="outline"
          className="flex-1"
          onClick={() => {
            NorlaxWidget.sendMessage({
              message: "Make the square red like a flower",
            })
          }}
        >
          Red like a flower
        </Button>
      </div>

      <script
        defer
        src="https:///widget.js"
        data-launchpad-slug-id={
          process.env.NEXT_PUBLIC_NORLAX_DEFAULT_LAUNCHPAD_SLUG_ID!
        }
      />
    </>
  )
}
Functions are a fundamental component in Norlax, designed to enhance the capabilities of Large Language Models (LLMs) like GPT.
In many ways, functions in Norlax mirror those found in programming languages such as Python or Javascript. They accept specified inputs, process them through a series of coded instructions, and yield an output.
Consider, for instance, a function designed to perform complex mathematical calculations. Given that current versions of GPT are not particularly adept at math, this function could take a mathematical expression as an input, evaluate it, and return the computed result. In such a scenario, if the LLM needs to execute a complicated calculation, it can simply invoke this function and delegate the mathematical heavy lifting to it.
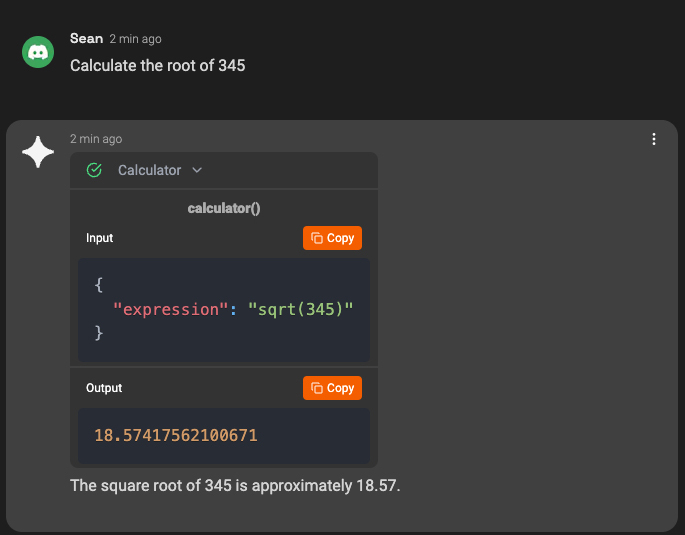
sqrt(345)
18.57417562100671
The square root of 345 is approximately 18.57.
Custom Functions are a developer-oriented feature that enables you to expand the capabilities of the AI by writing your own functions. It empowers you to personalize and fine-tune the AI functionalities according to your needs. This feature allows the AI to perform tasks that go beyond its inherent capabilities, making it a more flexible and adaptable tool.
We have multiple ways to create custom function:
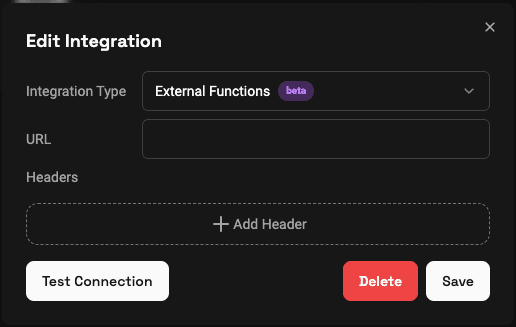
Using HTTP Functions you can host custom functions on your own infrastructure, while still being able to use them within Norlax. The easiest way to implement a HTTP Function is by using the NorlaxFunctionHandler.

As a TypeScript / JavaScript developer, you can leverage our Hosted Functions feature. We host your functions, allowing you to concentrate on the business logic. You have nothing todo with servers, scaling, or security. Just provide the code and we take care of the rest.

We are using Deno to run your code. You can deploy either TypeScript or JavaScript code and use any package from npm or Deno. To use an external package just import them as you usually would, no need for a package.json or install commands.
The code editor automatically loads TypeScript types from esm.sh. So you can use autocomplete & type checking.
Some packages and Deno packages might not work, due to different package structures.You can still use the packages & deploy your code, but you won't get any type hints in the editor. Please let us know if this happens in our Discord so we can improve the experience.
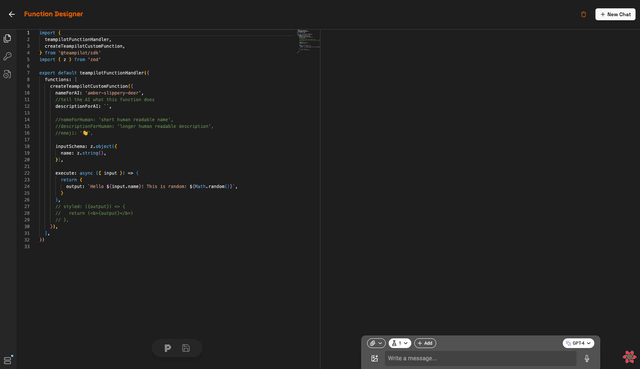
Let's jump into the code:
import {
  NorlaxFunctionHandler,
  createNorlaxCustomFunction,
} from '@Norlax/sdk'
import { z } from 'zod'

export default NorlaxFunctionHandler({
  functions: [
    createNorlaxCustomFunction({
      nameForAI: 'apricot-courageous-worm',
      //tell the AI what this function does
      descriptionForAI: '',

      //nameForHuman: 'short human readable name',
      //descriptionForHuman: 'longer human readable description',
      //emoji: '👋',

      inputSchema: z.object({
        name: z.string(),
      }),

      execute: async ({ input }) => {
        return {
          output: `Hello ${input.name}! This is random: ${Math.random()}`,
        }
      },
    }),
  ],
})
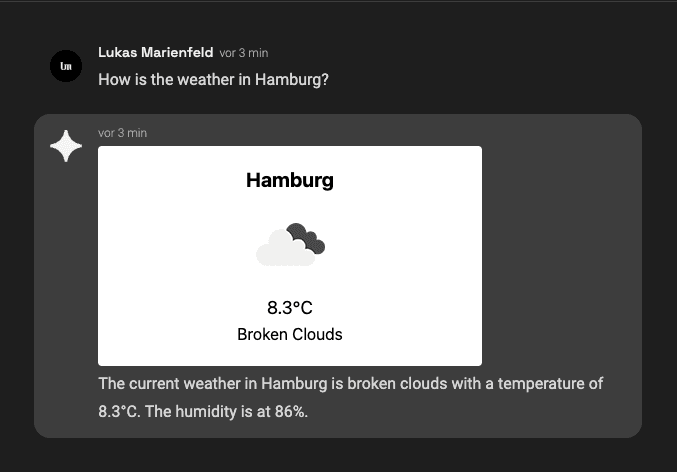
In Hosted Functions you can also take advantage of the styled property. The styled property acts as a React component that get's rendered in the chat when the function is called. This is useful for functions that return a visual output, like a chart or a table. It has access to the input and output of the function. All while being fully typed.
import {
  NorlaxFunctionHandler,
  createNorlaxCustomFunction,
} from "@Norlax/sdk"
import { z } from "zod"
import { type FC } from "react"

const fetchWeather = async (location: string) => {
  const apiKey = Deno.env.get("OPENWEATHER_API_KEY")
  const url = `https://api.openweathermap.org/data/2.5/weather?q=${location}&appid=${apiKey}&units=metric`

  const response = await fetch(url)
  if (!response.ok) {
    throw new Error("Network response was not ok")
  }
  return response.json()
}

interface WeatherWidgetProps {
  weather?: {
    name: string
    main: {
      temp: string
    }
    weather: [
      {
        description: string
        icon: string
      }
    ]
  }
}

const WeatherWidget: FC<WeatherWidgetProps> = ({ weather }) => {
  return (
    <div className="max-w-sm rounded overflow-hidden shadow-lg bg-white p-5 text-black">
      <div className="text-center flex items-center justify-center flex-col">
        <div className="text-xl font-bold">{weather?.name}</div>
        <img
          src={` https://openweathermap.org/img/wn/${weather.weather[0].icon}@2x.png`}
        />
        <div className="text-lg">{`${weather?.main.temp}°C`}</div>
        <div className="capitalize">{weather?.weather[0].description}</div>
      </div>
    </div>
  )
}

export default NorlaxFunctionHandler({
  functions: [
    createNorlaxCustomFunction({
      nameForAI: "getCurrentWeather",
      //tell the AI what this function does
      descriptionForAI: ``,

      //nameForHuman: 'short human readable name',
      //descriptionForHuman: 'longer human readable description',
      //emoji: '👋',

      inputSchema: z.object({
        location: z.string(),
      }),

      execute: async ({ input }) => {
        const weather = await fetchWeather(input.location)
        return {
          output: weather,
        }
      },
      styled: ({ output }) => {
        return (
          <>
            <script src="https://cdn.tailwindcss.com"></script>
            <WeatherWidget weather={output} />
          </>
        )
      },
    }),
  ],
})


As a little bonus, Norlax will cache the result of your request for a certain amount of time, which you can specify in your requests as "cacheTtlSeconds". So if you make the exact same request multiple times, in the time frame of the cache, Norlax will just send you the cached result instead of generating a new result. If you don't specify a cacheTtlSeconds, the SDK will default to caching forever. If you don't specify a cacheTtlSeconds and use the API, the API wont cache at all. If you don't want any caching, you can always set cacheTtlSeconds to 0.
If your sending exactly the same request multiple times, the results will most probably be very similar, so why don't just cache it and safe some money. The AI is quite cost intensive so it's helpful having caching implemented right away, no infrastructure needed on your side.
If you use the SDK and really don't want caching, you can either set cacheTtlSeconds on every request to 0 or set the default value in your environment variable NORLAX_DEFAULT_CACHE_TTL_SECONDS or NEXT_PUBLIC_NORLAX_DEFAULT_CACHE_TTL_SECONDS to 0. If both are set, NORLAX_DEFAULT_CACHE_TTL_SECONDS will be used.
The Norlax API currently offers one endpoint.
Here is an example on how to use the API to fetch data from Norlax.
fetch('https://norlax.app/api/rest/message', {
  method: "POST",
  headers: {
    "Content-Type": "application/json",
  },
  body: JSON.stringify({
    launchpadSlugId: 'my-launchpad-12314513123213',
    message: 'Why is Norlax SDK awesome?',

    // Optional:
    schema: {
      "type": "array",
      "items": {
        "type": "object",
        "properties": {
          "no": {
            "type": "number"
          },
          "reason": {
            "type": "string"
          }
        },
        "required": [ "no", "reason" ]
      }
    }
    cacheTtlSeconds: 60 * 60 * 24 * 7, // 1 week
    chatroomId: "8ebd214b048d9354eb7afe33314d1d30" // continue chat
    accessLevel: "TEAM" // TEAM or LINK_READ or LINK_WRITE (default TEAM)
  }),
})
type Output = {
  message: {
    content: string
    data?: any // if you provided a schema, this will be the parsed data
  }
  mediaAttachments?: {
    id: string
    type: 'IMAGE' | 'AUDIO' | 'FILE
    url: string
  }[]
  usage: {
    teamTokens: number
  }
  chatroom: {
    id: string
    url: string
  }
}
npm install @Norlax/sdkThe Norlax SDK is a wrapper around the API and makes working with it in Typescript a bit nicer.
The core of the SDK is the fetchNorlax function. This is the primary gateway to Norlax, it handles every request. Then there are 3 sub functions that provide a nicer output depending on your needs. There is fetchNorlaxData which just returns the data you requested in the specified format (specified by the schema you passed in). Then we have fetchNorlaxText which only returns the text Norlax has generated. And then there is fetchNorlaxMedia which returns the first media attachment.
So if you really only care about the generated result such as the text or the data, you can use one of the sub functions. If you care about any additional information such as the generated chatroomId or the usage, you can use the main function.
The input parameters are all the same for the main function and the sub functions.
| Name | Default | Description | Required |
|---|---|---|---|
| launchpadSlugId | Specified in the env vars by setting NORLAX_DEFAULT_LAUNCHPAD_SLUG_ID | The ID of the launchpad you want to use | Yes (unless default is set) |
| message | The message that gets sent to the AI | Yes | |
| schema | The Zod schema which defines in which format you want the response | No | |
| cacheTtlSeconds | Specified in the env vars by setting NORLAX_DEFAULT_CACHE_TTL_SECONDS or forever | The time in seconds results should be cached. The results are cached by your request parameters, so if you send the same request twice, the cache is triggered. Setting to 0 disables caching. Can also be set to 'forever' | No |
| chatroomId | If not set, a new chat is created. If you specify an existing chat, the message will be sent in that chat | No | |
| accessLevel | TEAM | If a new chat is generated, this sets the access level. Options are 'TEAM' (only team members can view the chat), 'LINK_READ' (anyone with the link can read the chat), and 'LINK_WRITE' (anyone with the link can read and write in the chat) | No |
| customFunctions | You can pass custom functions the AI should have access to | No | |
| customFunctionsMaxExecutions | 10 | Sets the max of how often custom functions can be called by the AI | No |
| functionExecution | No |